

|
| uCoz Community uCoz Modules Online Shop E-shop Module settings (illustrated tutorial) |
| E-shop Module settings |
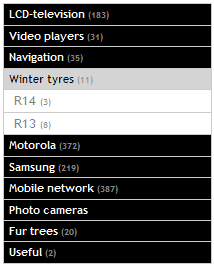
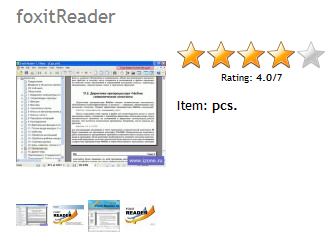
Control panel->E-shop->Module settings 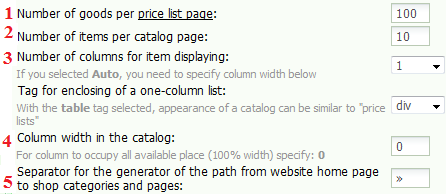 1. Defines the number of goods, which are going to be displayed at one price list page. The rest of the items are going to be displayed on the other page (page switcher will appear automatically). 2. Defines the number of goods, which are going to be displayed at one page in a category. The rest of the items are going to be displayed on the other page (page switcher will appear automatically). 3. I believe it is clear. Mind, if you select “Auto” - you need to specify column width below in pixels. If you don't – the value of this field will become “1” by default. If you select 1 on purpose, another field will appear under the current one. It is “Tag for enclosing of a one-column list” field. With the table tag selected, appearance of a catalog can be similar to "price lists". 4. The width of each column is defined here. It is set in pixels (px). If you have selected “Auto” in the previous field, the number of columns is going to be defined in accordance with their width. 5. These are separators here  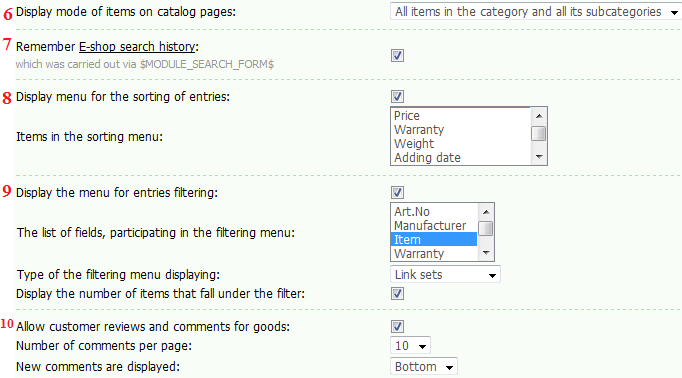 6. Defines the way the items are going to be displayed on the catalog pages (either the items from the current category are going to be displayed on the catalog page or all the items in category and its subcategories are). 7. If you enable this feature by checking the box – you will be able to see what users were searching for in your E-shop module. It can be done by means of E-shop->Statistics and reports->E-shop module search option. Just set the time period you are interested in and see users' search requests. 8. If you check this box – you will be able to sort the items on the website. The field “Items in the sorting menu” will appear in the Control panel as well, so you will be able to select the sorting mode. See the screenshot of the sorting menu (sorting by Art.No).  9. If you check this box – you will be able to filter the items on the website. The field “The list of fields, participating in the filtering menu” will appear in the Control panel as well, so you will be able to select the filtering mode. See the screenshot of the filtering menu (filtering by Item).  10. You will allow users to leave their comments on the entry page by checking this box. If you enable this feature – the fields “Number of comments per page” and “New comments are displayed” are going to be displayed in the Control panel. With their help you can set the number of users' comment at one entry page as well as their location. 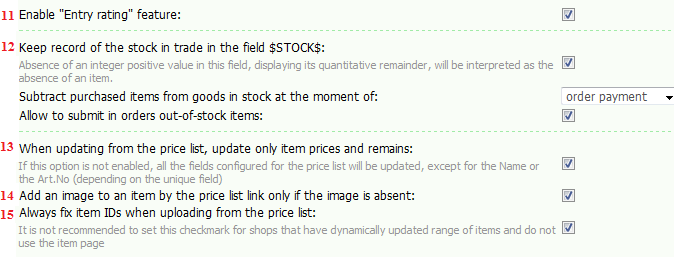 11. By checking this box you will enable the possibility to rate this item. It looks like this 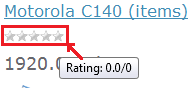 12. If you check this box – the track of goods that have remained are going to be kept. Two more fields will appear as well. They are: “Subtract purchased items from goods in stock at the moment of” and “Allow to submit in orders out-of-stock items”. The first field helps to set the moment of subtracting the purchased goods from the stock (either when the order is submitted or paid for). The second field allows to order the goods with “0” stock value. 13. If this option is not enabled, all the fields configured for the price list will be updated, except for the Name or the Art.No (depending on the unique field). Otherwise only item prices and remains fields are going to be updated. 14. I believe it is clear. 15. When you check this box, items IDs are going to be fixed, if you have uploaded those items from the price list. It is not recommended to set this check mark for shops that have dynamically updated range of items and do not use the item page. 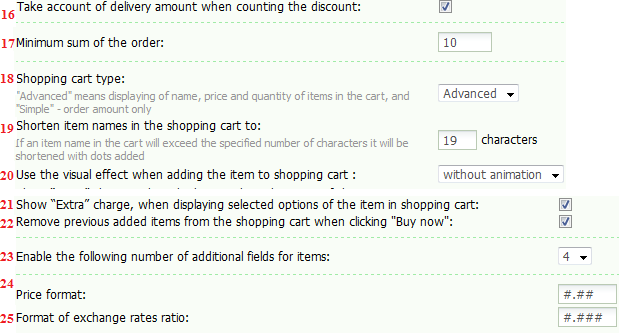 16. This is smth similar to a discount system. Let's say a user purchased goods (or a good) that cost a certain (predefined) sum of money. Such a user has a right to purchase the rest of the items with a certain discount. If you check this box – 3 more fields will appear. They are “Calculate discount by the matrix” field which allows to select the matrix that will be used to calculate the discount. (You may set the matrix by clicking on this word). And two more: “Take into account the amount of an order being submitted when calculating a discount”, “Take account of delivery amount when counting the discount”. 17. I believe this option is clear. 18. You may select the shopping cart type here. "Advanced" means displaying of name, price and quantity of items in the cart. And "Simple" – total cost of order only. 19. You may set the number of characters the item name in the shopping cart will have. If an item name in the cart will exceed the specified number of characters it will be shortened with dots added. 20. You may select visual effects that will appear, when adding the item to the shopping cart. They are: floating image or a floating boarder at choice. You might select not to use animation as well. 21, 22. I believe these options are clear. 23. With the help of this option you will be able to add the necessary number of custom fields to the form of adding the items. You might change their default names (Custom field 1,2..) via Substitution of default phrases option. 24, 25. The format of the price and the exchange rates is set here. Attachments:
2873752.png
(0.9 Kb)
·
9540532.png
(1.3 Kb)
·
3800789.png
(3.6 Kb)
·
7719551.png
(2.9 Kb)
·
9531775.png
(30.7 Kb)
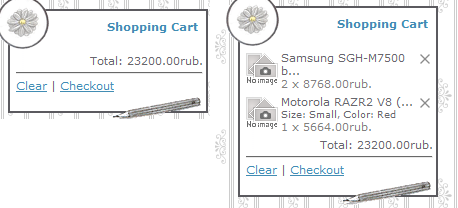
|
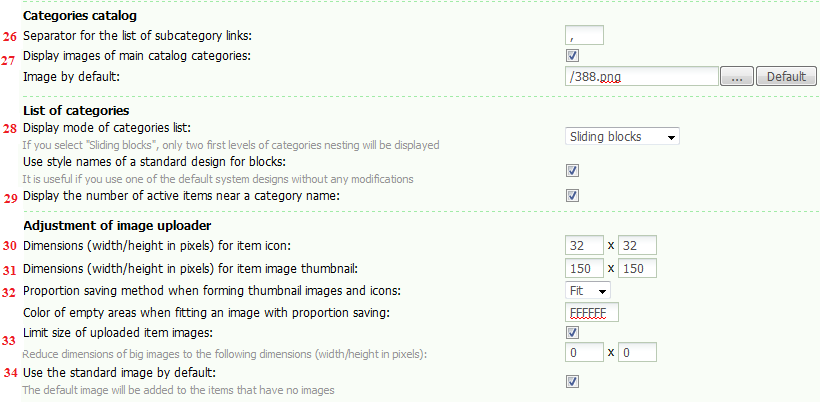 26. This is a separator: 27. If you check this box, the images of main catalog categories will be displayed on the website. It is possible that the default image will be displayed or you may upload your own image. To do so click “...” button->find the image in the File Manager (upload it there beforehand)->click on that image->Save. This is the way the category will look with the uploaded image: 28. Here you may define the way the list of categories will look in the “Section categories” block. If you select “Drop-down tree” the block will look like this: Sliding blocks look like this: 29. If you check this box, the number of items in each category/subcategory will be displayed next to its name in brackets. 30. Item icons are present, if the item has several images. They are displayed on the Entry page under the main icon. See the example: 31. This is where you set the dimension of the item pre-view image to be displayed on the module pages. 32. If you select “Fit” - the image will reduce proportionally. When you select this option “Color of empty areas when fitting an image with proportion saving” field appears. If there are transparent parts in the image, the color of those areas can be set here after fitting an image with proportion saving. If you select “Cut” - the image will be cut in accordance with the set dimensions without being reduced. 33. If this option is enabled, you are able to set the reduced dimension of big images. 34. The default image will be added to the items that have no images. 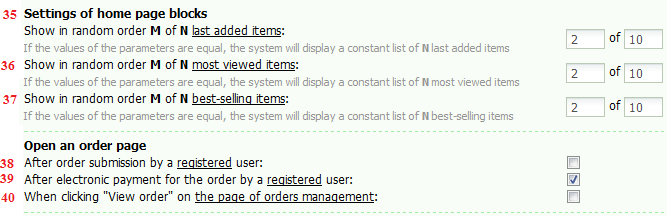 35, 36, 37. In this example N and M are 2 and 10. If N equals M, N and M values will define the number of entries that are displayed in the list of the recently added items. If N and M are not equal, the entries are displayed randomly. N – is the number of displayed entries. M defines the number of the recently added entries that are displayed randomly. It means that if the values are set as 2 and 10 – two entries will be displayed. When the page refreshes – they will be substituted with any 2 entries out of 10 recently added entries. The same implies to paragraph 35 and 36. 38, 39,40. All the options here define the action after which an order page will open. 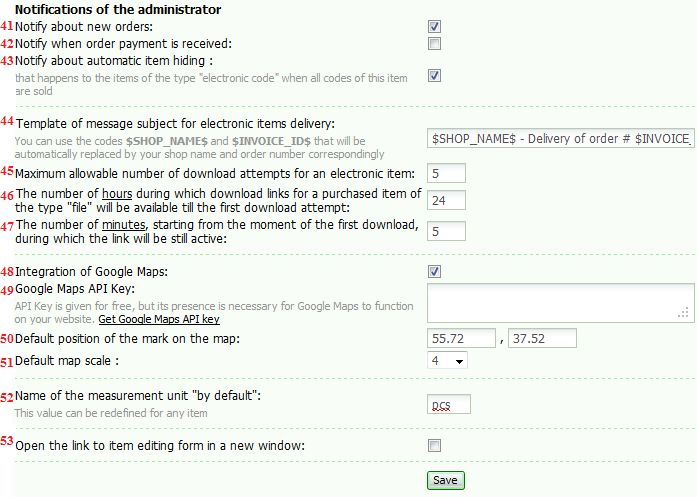 41, 42, 43 Notifications will come to the e-mail address you have set in Common settings. 44. This is the template of the message topic. The message, which users who have purchases an item will receive. $SHOP_NAME$ is the name of E-shop module. It can be change in Module settings here (the first field). 45. As we can see in the example – 5 is the value of the field. It means that the electronic item may be downloaded by 5 different users from 5 different IP addresses. 46. As we can see in the example – 24 is the value of the field. It means that the customer will be able to download the electronic item within 24 hours after its purchase (download link will be valid for 24 hours). 47. As we can see in the example – 5 is the value of the field. So when the customer tries to download the electronic item (using the link) – it will be available within 5 more minutes. So this user has 5 more minutes to try and download the item again, if smth goes wrong. 48. You may enable Google Maps on your website by checking this box. See more about Google Maps here: http://maps.google.com 49. You will need to obtain Google Maps API Key first and type it in the box. It can be done here: http://code.google.com/intl/en-EN/apis/maps 50, 51. You may set the default position and the scale of the map, so that customer will see a map of a convenient scale by default and at a certain point (like the capital of your country etc.). 52. All the items in E-shop will be measured in this value by default, like “pcs” - pieces. This value can be redefined as well as set for each item separately. 53. I believe it is clear. Attachments:
9777696.png
(1.7 Kb)
·
3575817.png
(3.7 Kb)
·
7166451.png
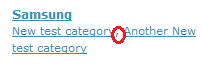
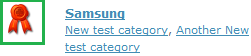
(7.6 Kb)
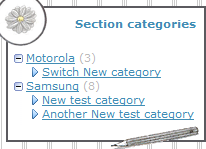
·
3691049.png
(5.6 Kb)
·
9684679.png
(46.7 Kb)
|


| |||
| |||

Need help? Contact our support team via
the contact form
or email us at support@ucoz.com.