

|
| uCoz Community uCoz Modules Online Shop E-shop Categories management |
| E-shop Categories management |
It is possible to work with categories within our E-shop. We provide excellent tools for fine categories settings.
Adding a category It can be done in two ways: 1) Adding categories via a price list. This is convenient, when you work with a big amount of items and you have a price list of them. When working with a price list you can automatically create the necessary amount of categories. Control panel->E-shop->Processing of .xls price list. Create a configuration and upload your price list. Set the categories in the price list in the way, it is shown in the screenshot: 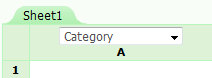 Continue setting the configuration fields. Save parameters and upload items from all configured worksheets. See more about price list here: http://forum.ucoz.com/forum/40-13840-79630-16-1310471373 If you set the configuration correctly, items with their names and prices are going to be added to the website automatically. Supposedly, they are going to be sorted into categories as well. 2) Adding categories manually. It can be done in Control panel->E-shop->Categories management  Categories management Control panel->E-shop->Categories management. In Categories management section you will see a list of categories as well as buttons to manage them. 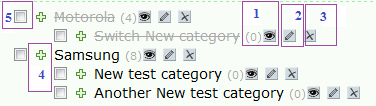 1) With the help of this button you will be able to hide the category in the menu and in the list of categories on the website. 2) With this button you may edit category properties. 3) Remove the category with the help of this button. 4) Nest one category inside the other one with the help of this button (you need to drag the category and in this way nest it inside the other one). 5) “Invert” button. Check the boxes of categories with this button. If you change something (remove, invert, nest etc.) make sure to click “Save” button afterwards. There is a floating ajax window, which allows to carry out quick operations with categories. It is extremely convenient to use it, when removing marked categories. “Quick replacement of text in all categories” feature is also available within this section. Categories settings Common categories settings can be found in Control panel->E-shop->Module settings->Categories catalog. You may set the separator for the list of subcategory links here as well as the display of the images of main catalog categories (both custom and default). List of categories. Here you may set the display mode of categories list on the website as well as the display of the number of active items near the category name. Each category has its properties and the possibility to set them  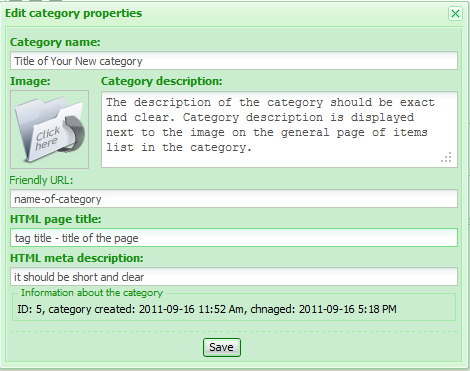 You need to remember that when you set the image for each category, those images should be of the same size. They shouldn't be very large. The larger the image is, the bigger “Category description” field is. If you allow to “Display images of main catalog categories” in E-shop Module settings, but you didn't set this image when adding/editing this category, the default image would be displayed. You may change the default image as well. You need to remember that when you set the image for each category, those images should be of the same size. They shouldn't be very large. The larger the image is, the bigger “Category description” field is. If you allow to “Display images of main catalog categories” in E-shop Module settings, but you didn't set this image when adding/editing this category, the default image would be displayed. You may change the default image as well. Code Code <?$CATALOG$(N,K)?> When editing the category you may see its ID as well as the date of its creation and change. When adding the item to the website manually, you may add the items to several categories at the same time (so that one item will belong to several categories simultaneously). |


| |||
| |||

Need help? Contact our support team via
the contact form
or email us at support@ucoz.com.