

|
| uCoz Community » uCoz Modules » Online Shop » Products Comparison (Manual) |
| Products Comparison |
For the Products Comparison feature to function correctly, you need to configure filters for your products. Click here for the setup guide. To make it possible for customers to compare products, it’s necessary to put the $2COMPARE$ control in place. It is available in the Item appearance in the catalog and the Product page templates. Here’s how the compare buttons look: 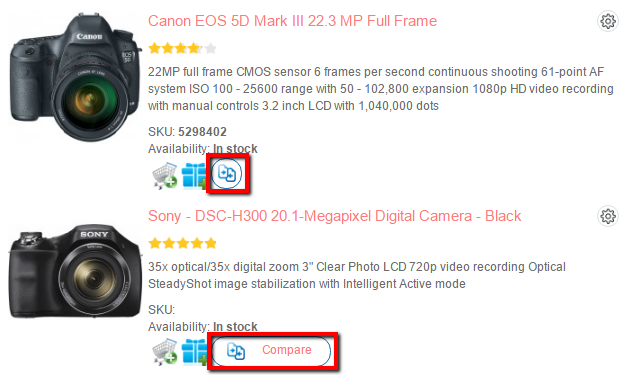 In the first case, the product is not added to the comparison list. In the second one, the product is added to the list and there’s a link taking to results. The compare buttons source code $2COMPARE$ is as follows: Code <script type="text/javascript"> function comparelistToggle( caller ){ if(lock_buttons) return; var id = $(caller).data('id'); $('.compare-widget-'+id).addClass('compare-widget-wait'); lock_buttons = 1; _uPostForm('', {type:'POST',url:'/shop/compare', data:{'action':'toggle', id:id}}); } </script> <div class="compare-widget-wrapper"> <div class="compare-widget compare-widget-$ID$ compare-widget-remove" id="" onclick="comparelistToggle(this)" data-id="$ID$"></div> <a href="/shop/compare">Comparison</a> </div> The Compare link takes to the /shop/compare page. The Page of service forms is responsible for the page’s appearance. The condition is as follows: Code <?if $PAGE_ID$ = 'compare'?> products comparison page <?endif?> If products added to the comparison list belong to different groups, they are compared by groups and separated by tabs.  The product group’s number is added to the page’s URL (each group has its own URL). Example: /shop/compare/2 /shop/compare/9 /shop/compare/12 ... Important! The shop.css file (Online Shop -> CSS) must be updated for the compare buttons to be displayed correctly.
|


| |||
| |||